Creating Groups
How to Create Groups within Your Course
1. Navigate to your course.
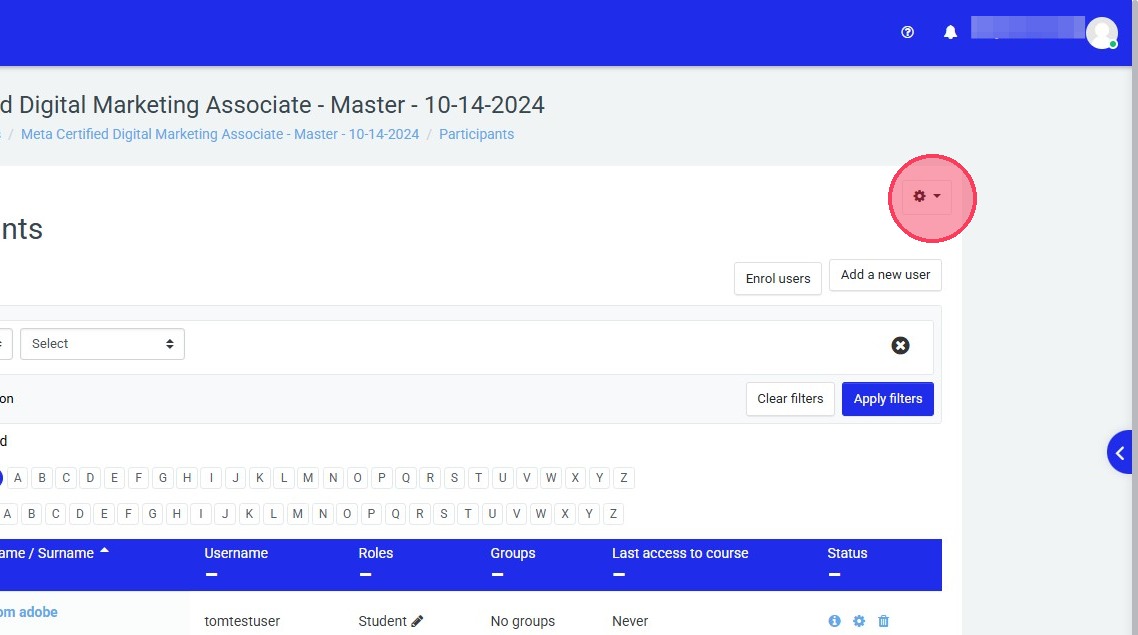
2. Click the 3 lines to the left of your screen.

3. Click "Participants"

4. Click this gear icon for the drop down menu.
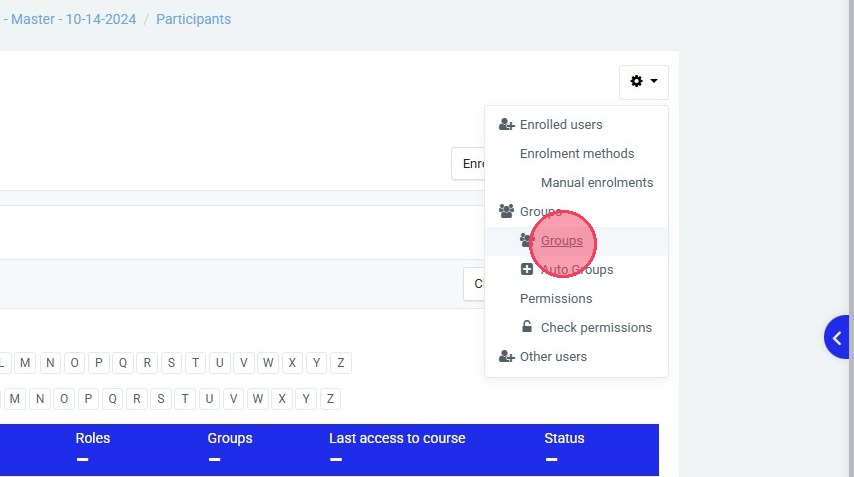
5. Click "Groups"
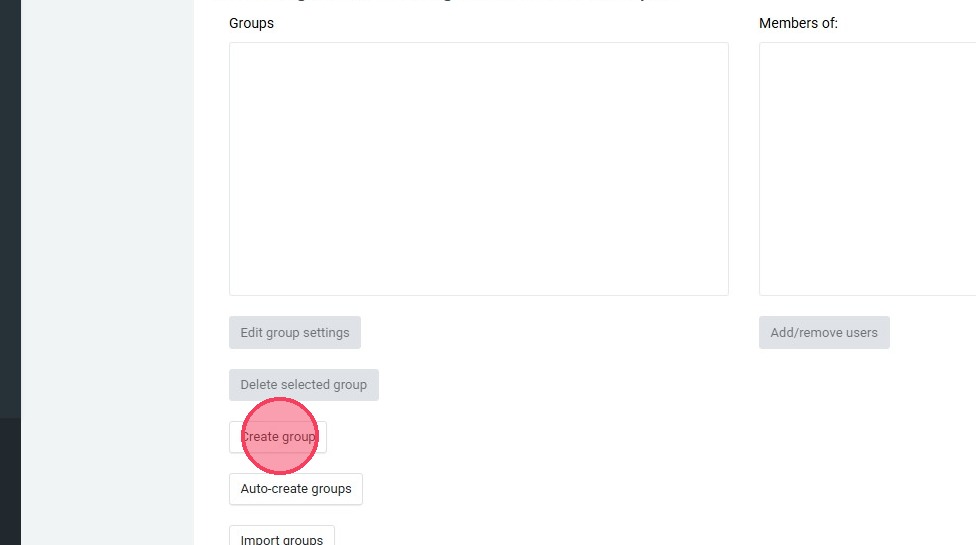
6. Click "Create group"
7. Click the "Group name" field.
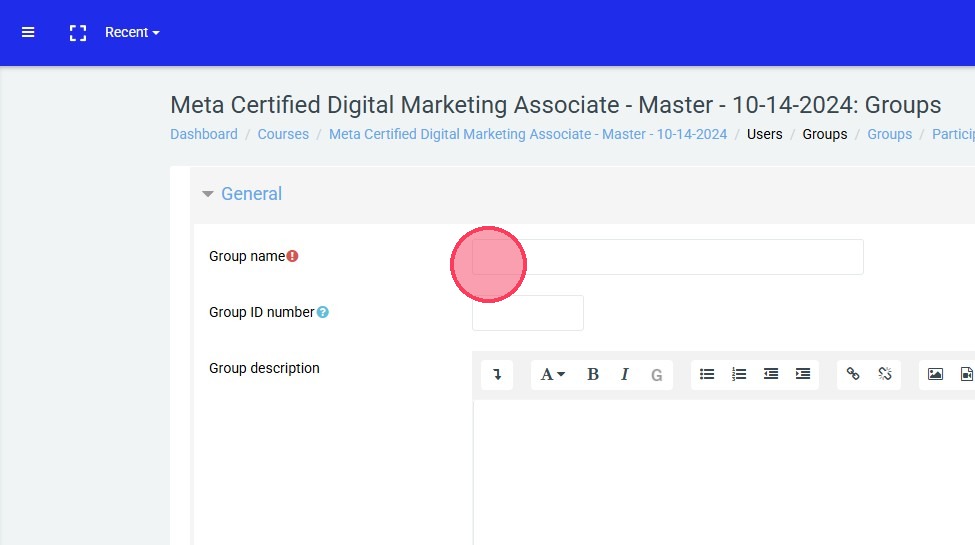
8. Type "Period 1" or whatever you would like to name your group.
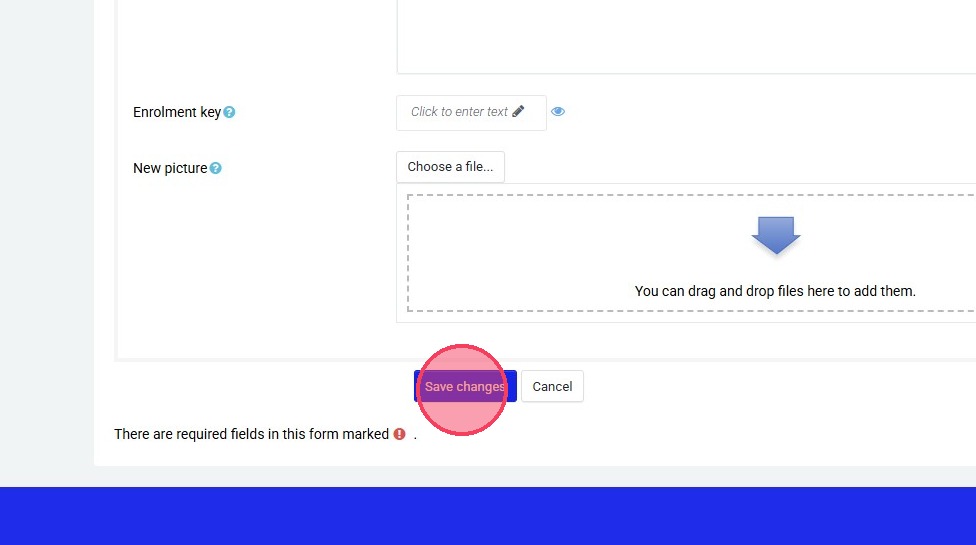
9. Click "Save changes"
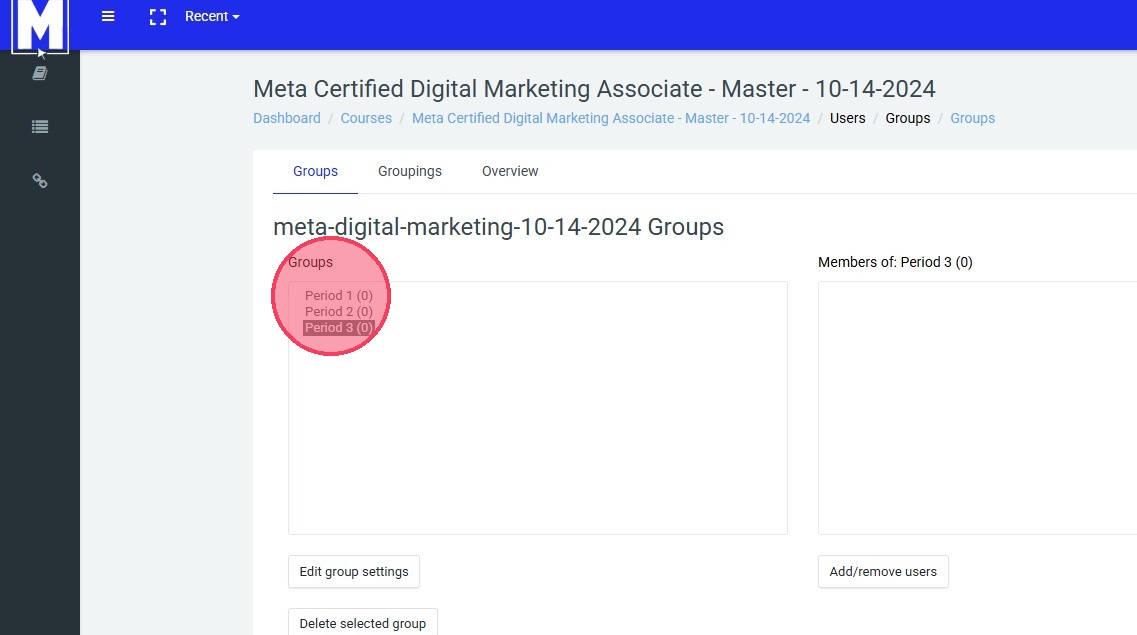
10. Once you have one group created, you can repeat that process until you have your desired number of groups.
11. All of your groups will appear like this in the "Groups" box.
Related Articles
Edit Group Enrollment
How to Edit Group Enrollment for a Course Participant 1. To change or updated which group your students are in, begin by navigating to your course. 2. Click the 3 lines on the left of your screen in order to navigate to participants. 3. Click ...Editing the Period Selector
How to Add and Remove a Group from the Period Selector. 1. Navigate to your course. 2. Click "Choose Your Period Here" 3. Click the gear icon to reveal the drop-down menu. 4. Click "Edit settings" 5. Choose the groups you wish to have as an option ...Adobe In-App File Extension Resolution
If you are experiencing an issue with the Adobe Panel where the activity is not validating please refer to this solution. In most installations, users encounter no issues. However, for those who do experience this specific problem, we've developed a ...Adding Access Restrictions
Adding Access Restrictions Note: Not all activities support access resection. Access Restrictions are supported on Quizzes, Project Quizzes, SBAs, Labs, and Topics. They are not supported by stand alone knowledge checks and 'slide style' case ...